I first heard about AWS Connect back when I was getting ready for re:Invent 2018. Initially I was confused that it was another type of VPN tunnel or circuit offering in AWS. As I attended the Moving Large Scale Contact Centers to Amazon Connect session presented by AWS, Hilton Hotels, and Intuit, I quickly learned it’s impacting potential.
What is it?
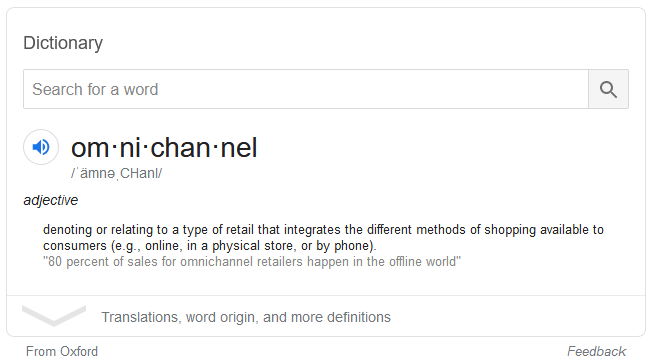
If you go to the Amazon Connect site, you will currently see this as their definition: “Amazon Connect is an easy to use omnichannel cloud contact center that helps companies provide superior customer service at a lower cost.”
Did you have to do this too???

Amazon Connect provides the ability to deliver both a voice-based and a chat-based contact center, all through the same agent (person taking requests to interact with the customer) interface.
History
So why in the world does Amazon think they are now a contact center provider? There are so many other companies providing call center technologies, combined with IVR (Interactive Voice Response), call recording, softphones, and all the other buzzwords in the IT space we call telephony. Cisco, Verizon, AT&T, and Avaya are some big giants to name a few, and they have long-standing histories in the call center space.
Well it turns out that Amazon built out their own contact center for their retail space to take our calls for help with things like Amazon Prime and AWS support. After some time, they thought that their genius solution would make a good product offering to sell as a service. And they were right. In March of 2017, they announced the availability of Amazon Connect.
Contact Center Concepts
The general idea of a contact center is that there are agents sitting by the phone, waiting for customer calls to come in for assistance. The customer can press a number to determine what queue they want to go into (ie: Customer Service, Tech Support, Billing, etc). Once a customer gets into the system, their call is routed to the desired queue. An available agent can then pick up the call and provide service to the customer.
Typical features of good contact centers are:
-
Call Recording
-
Call Transfers
-
Integration into CRM (Contact Resource Manager)
-
Handle both voice and chat sessions
Now what is the pie-in-the-sky desire of all Customer Service organizations for their contact centers?
“When the customer is calling in, I want the call information, along with account information to pop up on the screen for the agent”.
Can Amazon Connect deliver pie-in-the-sky? You bet it can…and cake, ice cream, and iced cappuccino too. I have discovered that it is literally insane what options and features the Amazon Connect service offers.
Here are just a few:
-
One GUI/interface for voice calls and chat sessions
-
Interaction with databases/systems (Even on-prem from the cloud!)
-
Agent logins authenticated by Active Directory
-
GUI wrapper customization for agent popups with caller account data
-
Multi-language support
-
Text-to-Speech and Speech-to-Text (including translation of languages!!!)
-
Realtime call analysis to detect angry callers
-
Full reporting
-
Realtime dashboards
-
Fully supported API and SDK libraries to create customized contact centers
-
No need for expensive desk phones, just use a headset plugged into the agent’s computer
Let’s Create A Contact Center
The initial setup is quite simple. Login to your AWS account, get into the Amazon Connect service, then simply “Add an instance”. When you create this new instance, you can link it to an existing Active Directory environment if desired.

After initial setup, you go to the Access URL and login

Next, assign a phone#. It is here you can “Claim” a number to transfer over. You can also choose local numbers, or a Toll Free number!

Once the phone number is setup, you attach a “Contact Flow” to the number. A Contact Flow is what determines will happen when a caller dials the phone number. There are quite a few example Contact Flows provided. You can choose one and edit it for your needs.
The Contact Flow editor provides an easy way to manage the entire call process.

Our First Call
We need to bring up the agent interface. This is done by clicking on the handset icon in the top right of the Connect browser page.

The interface is a web page. Resize/move as desired. We call our phone number.

A notification pops up. I answer the call and use my computer headset!

We have now successfully setup and tested a simple contact center with phone queue. Multiple agents can be assigned to the same queues, priorities can be given for certain agents, and agents can even go offline for breaks!
An Advanced Contact Flow
How about we go for that pie-in-the-sky? Let’s set some test requirements:
-
Set a female voice
-
Setup logging for debugging purposes
-
Play a welcome prompt when the caller dials in
-
Prompt the caller for their account number
-
Store the entered account number for future use
-
Retrieve customer Name, Address, State, and Zipcode from AWS RDS Aurora/MySQL database
-
Store customer address/name info for future use
-
Say “Hello” to the customer “Name”
-
Prompt customer to choose either the “Customer Service” or “Technical Support” queue
-
Place customer in requested queue
-
Once customer is in queue, agent gets customer info popped up on screen
Here’s our Contact Flow. Some of these are a bit advanced, but we’ll look at each step.

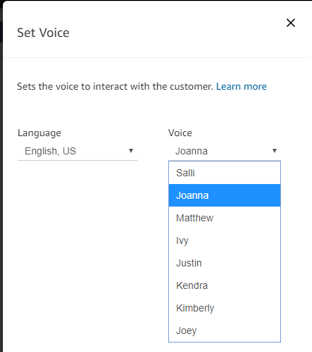
Set a female voice (Set voice)
You can choose from many different languages, with different accents and dialects.


Setup logging for debugging purposes (Set logging behavior)

Play a welcome prompt when the caller dials in (Play prompt)
You can upload and choose your own recorded voice, or let Connect do a text to speech.

Prompt the caller for their account number (Store customer input)
Here you can even encrypt the entered number from the customer for PCI/HIPAA/etc compliance.

Store the entered account number for future use (Set contact attributes)
Connect has a memory area called “Contact Attributes”. Any data entered/dialed/spoken/retrieved can be stored in this area for later use. We are going to store the previous “Stored customer input” into a variable (Destination key) called “AccountNum”.

Retrieve customer Name, Address, State, and Zipcode from AWS RDS Aurora/MySQL database (Invoke AWS Lambda function)
Now this section is a bit tricky. Lambda is the AWS service which allows you to run code/scripts without having to provision or manage a server. I have a Lambda function I wrote that queries the database for customer information. Connect will send the “AccountNum” key/variable for input into the Lambda function to use as a lookup.
I found these articles extremely helpful in setting up this configuration:
Invoke AWS Lambda Functions
Tutorial: Configuring a Lambda Function to Access Amazon RDS in an Amazon VPC

Here is the Lambda function, written in Python. It is extremely simple. It connects to the database, performs a SELECT statement on the CRM Addresses table, uses the customer-entered account number as a query parameter, and returns the row. The last thing to do is “return” the results in a “resultMap” as seen.

Here is the database table with some sample data:

Store customer address/name info for future use (Set contact attributes)
Now we need to store the results of the SQL query from the Lambda function into our “Contact Attributes”. We will store them with the variable/key names of “Name”, “Street”, “City”, “Zip”.


Say “Hello” to the customer “Name” / Prompt customer to choose either the “Customer Service” or “Technical Support” queue (Get customer input)
“Contact Attributes” can be referenced by the “$.Attributes.FIELD_NAME” variable, as seen in the screen capture below. We will default the customer to the Customer Service queue, or allow them to press 2 to go into the Technical Support queue.

Prompt customer to choose either the “Customer Service” or “Technical Support” queue (Set working queue)
Based on the call flow above, we can see with the arrows that by default, customers will go to the queue “BasicQueue” (I use that for Customer Service). If they press 2, the queue is set to “Technical Support”. I previously defined these queues in the Connect interface in the AWS console.

Place customer in requested queue (Transfer to queue)
Finally, we now have the customer in the desired queue. Once a caller goes into a queue, any agents assigned to that queue and set with a status of “Available” will see the call coming in and can then answer the call.
Once customer is in queue, agent gets customer info popped up on screen
This part is a bit tricky, and documentation was somewhat scattered.
These sites are very necessary to perform this task:
Amazon Connect Streams (GitHub)
Perform an external screen pop with Amazon Connect
Following these articles, I created a static HTML page that includes the necessary embedded javascript and Amazon Connect Streams API libraries. The static page and javascript file are ironically hosted in an AWS S3 bucket.
Here is the code. It is accessing the Streaming Events from Amazon Connect and when it sees a call connecting (entering queue Agent is part of), populates the HTML fields with the database information for the customer. At the end of the call, the fields are cleared in preparation for the next incoming call.

Let’s see the results!

Conclusion
Amazon Connect is pretty sweet! After just a couple of days of playing with the technology, I was able to setup a fairly advanced contact center with IVR functionallity. How much does it cost to use Amazon Connect? I’m glad you asked.
The pricing for this service is surprisingly inexpensive. Currently for a toll free number, the cost is $0.012/minute + $0.06/day for the toll free number (in the United States). That’s it. It doesn’t get more complicated than that. If you’re storing voice recordings, then you pay for the S3 storage. If you’re using other advanced features, you pay the price accordingly as well. You pay no setup fee and no maintenance fee.
The benefits of using Amazon Connect are almost endless. Here are just a few:
-
Stand up a contact center in minutes or hours
-
The entire technology stack requires NO maintenance and NO patching
-
The infrastructure is all DR/HA/BCP designed
-
Your agents can now be mobile and work from home
-
You do not have to sync thousands or hundreds of thousands of dollars into an IVR/phone system
-
No hardware refreshes
-
You can have a Prod, Test, DEV, or any other environment each with a unique phone number
-
No more storage for voice recordings

Scott Campbell
Senior Cloud Architect
Workgroup Technology Partners
https://www.wgtech.com

